| by William
Billingsley (Team 6061)
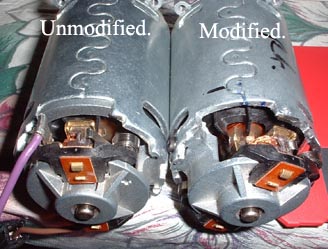
I heard a lot about the 18v Dewalt motors
before I bought some for my robot. My bot has two wheels and
when I installed my motors I noticed it was hard to drive in
a straight line. These motors have advanced timing in the CCW
(counter-clockwise) direction of about 15 degrees. In a tank
style setup, the advanced timing caused my bot to run faster
on the left and slower on the right side when going forward
and faster on the right and slower on the left when going in
reverse. You could re-time both motors to neutral but I decided
to re-time one motor to "match" the other but in the opposite
direction so I'll end up with two motors that when put face
to face will go "fast" forward and "slower" in reverse. Phasing
is adjusting the position of the motor brushes in relation to
the magnets.
Here's how I did it:
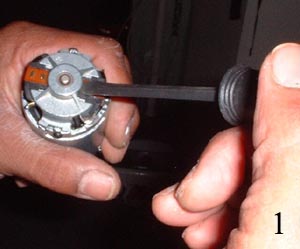
| 1. |
First I removed the brushes from the motor
with a screwdriver (see photo 1). |
 |
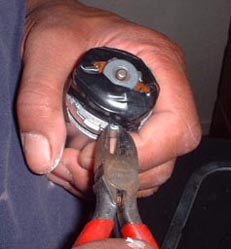
| 2. |
Then I removed the material that keeps the
motor together. I used some wire cutters and a Dremel tool
to do this. Make sure you tape the motor openings so metal
fillings don't drop inside. A can of air will blow out the
motor when your done. I also used wire cutters to "pinch"
some areas. Take your time and make sure all material is
removed. |
 |
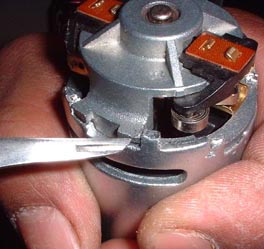 |
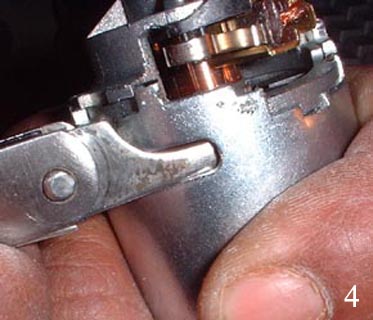
| 3. |
Now you can pry the top up by placing a tool
inside the vent and prying on the raised pry point (see
photo 4). Be careful and pry on each four points a little
at a time. You should see the brush holder coming off. Remove
then put aside. I ended up breaking the two arm parts off
of the brush holder so be careful. |
 |
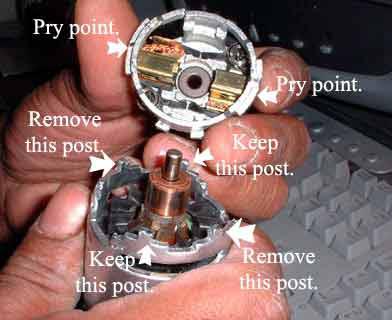 |
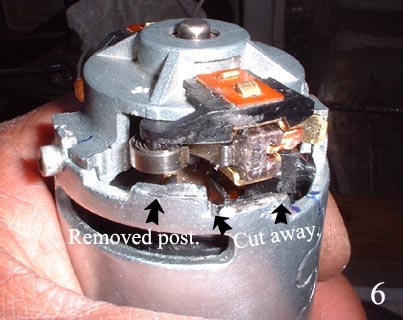
| 4. |
To turn the brushes approximately 30 degrees
clock-wise you have to make room for the brushes in the
motor housing. Use a cutting wheel and remove one post from
each side of the motor housing but make sure you remove
the ones on the right as you hold the motor in your hand.
Then enlarge the brush opening by cutting out the area to
the left of the existing opening (see photo 6). |
 |
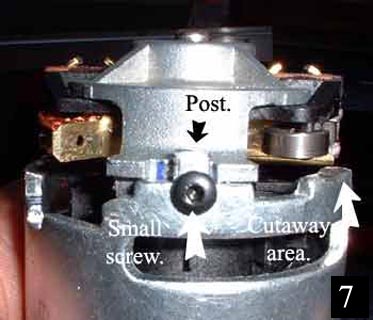
| 5. |
Now you can put the brush holder back on and
line it up on the post that remains. You can adjust the
degree of timing you want depending on where you drill the
hole through the brush holder.(See photo 7). |
 |
| 6. |
Next step is to drill a small hole so get
a small drill bit and tap set Size 4-40 and you're all done. |
 |
|